The Dell SonicWALL Next Gen NetFlow configuration is slightly different due to enhancements to the firewall configuration GUI. Today I will cover what has changed in the Next Gen firewalls’ NetFlow config and also include other configuration options that can affect your network traffic monitoring experience.
SonicWALL NetFlow configuration
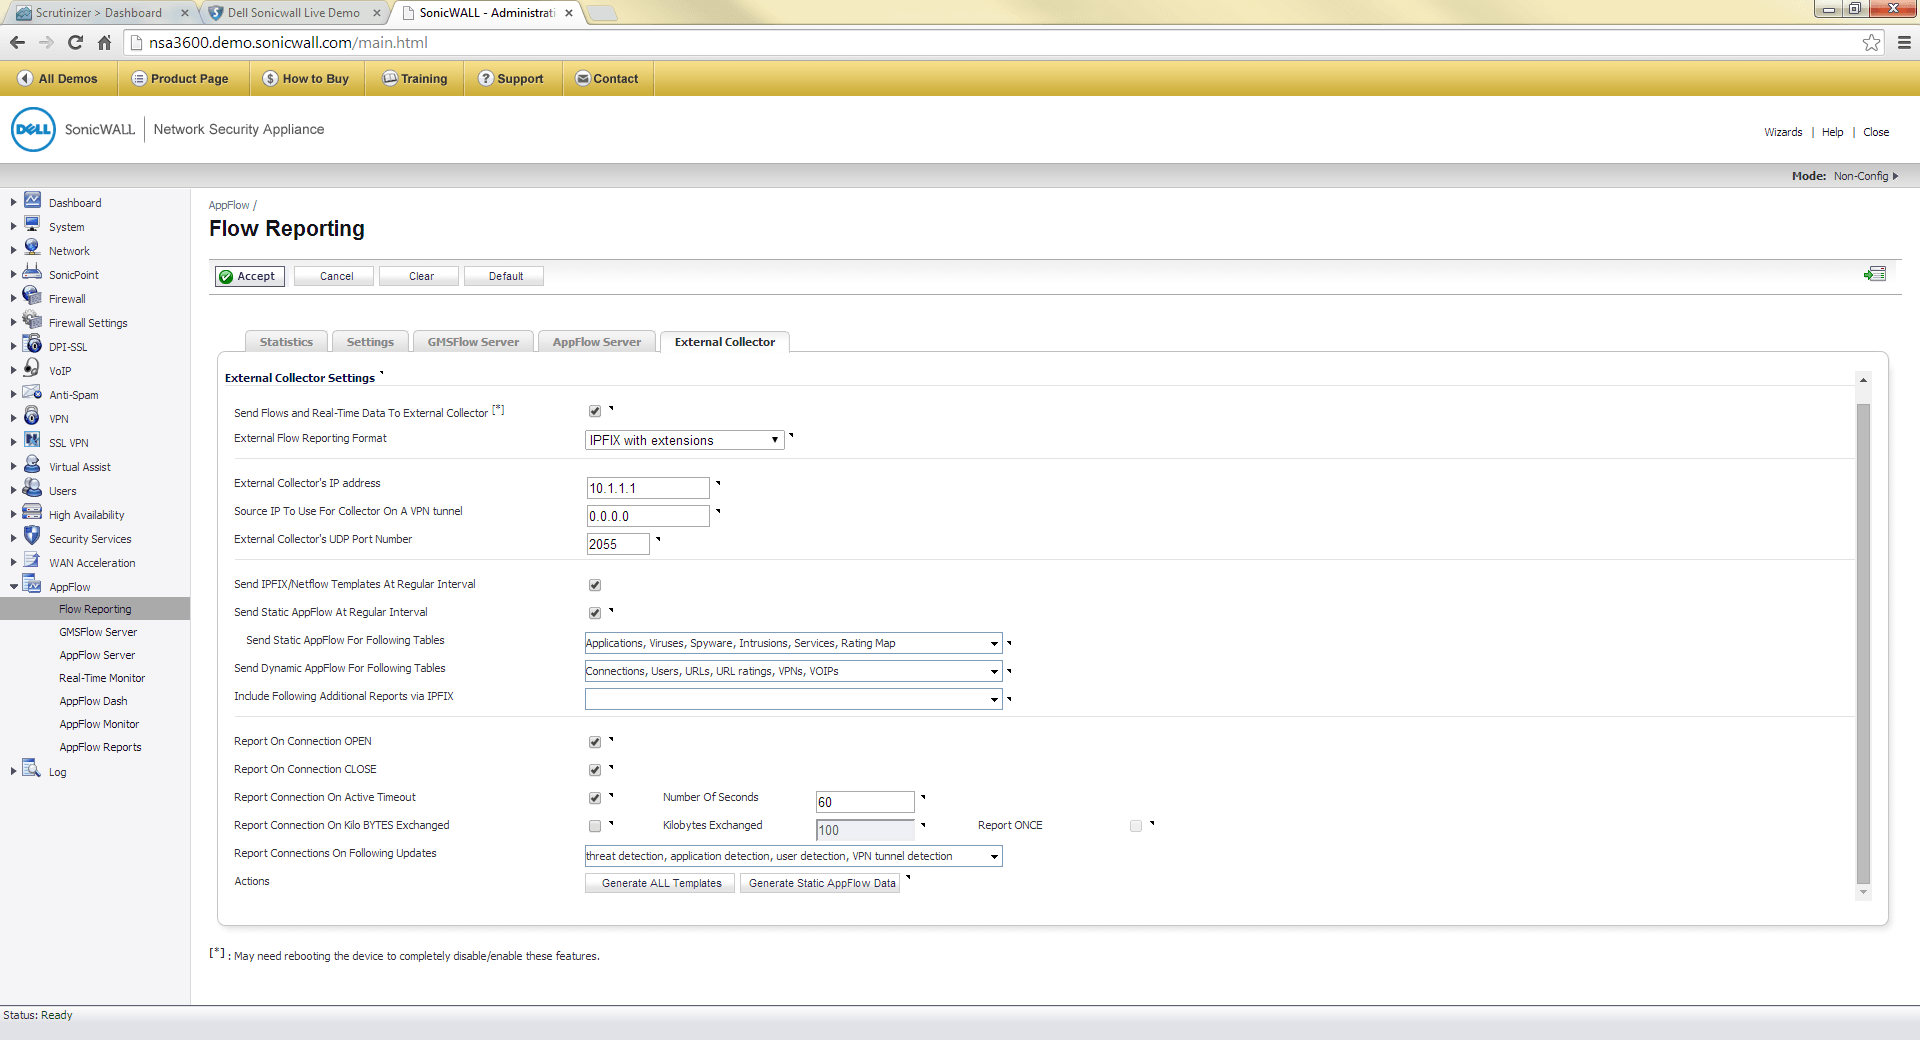
To start your Dell SonicWALL Next Gen NetFlow configuration, in the firewall GUI, go to AppFlow>>Flow Reporting, then select External Collector from the buttons just above the Flow Reporting Statistics.
That will take you to the page displayed below.
1. Check Send Flows and Real-Time Data to External Collector (you may need to reboot the firewall for the enable/disable flows to take effect).
2. Select IPFIX with extensions from the External Flow Reporting Format dropdown selection list.
3. Enter your NetFlow collector’s IP Address in the External Collector’s IP Address field.
4. Check both Send IPFIX/Netflow Templates at Regular Interval and Send Static AppFlow at Regular Interval
5. For richer flow reporting, ensure that the Send Static AppFlow for Following Tables and Send Dynamic AppFlow for Following Tables lists match the example above.
6. Next, Report on Connection OPEN and Report on Connection CLOSE should both be selected.
7. Also check Report Connection on Active Timeout, leaving the Number of Seconds at 60. (This setting specifies the firewall to export flows every minute, as opposed to waiting until the flow cache is full. That allows your NetFlow reporting solution to report traffic in a more timely manner.)
a. Since it’s either Report Connection on Active Timeout OR Report Connection on Kilo BYTES exchanged, we’ll leave the Kilo BYTES Exchanged option unchecked.
8. And, lastly, make sure that the Report Connections on Following Updates list matches the above example.
9. Click the Accept button at the top, and that’s it for the SonicWALL NetFlow configuration.
In a few minutes you should start seeing flows in your NetFlow Analyzer and you are on your way to in-depth network traffic monitoring.
SonicWALL SNMP config
Our Advanced NetFlow Analyzer solution uses SNMP Read-Only access to gather interface descriptions and speeds to add ease of use in your SonicWALL NetFlow reporting.
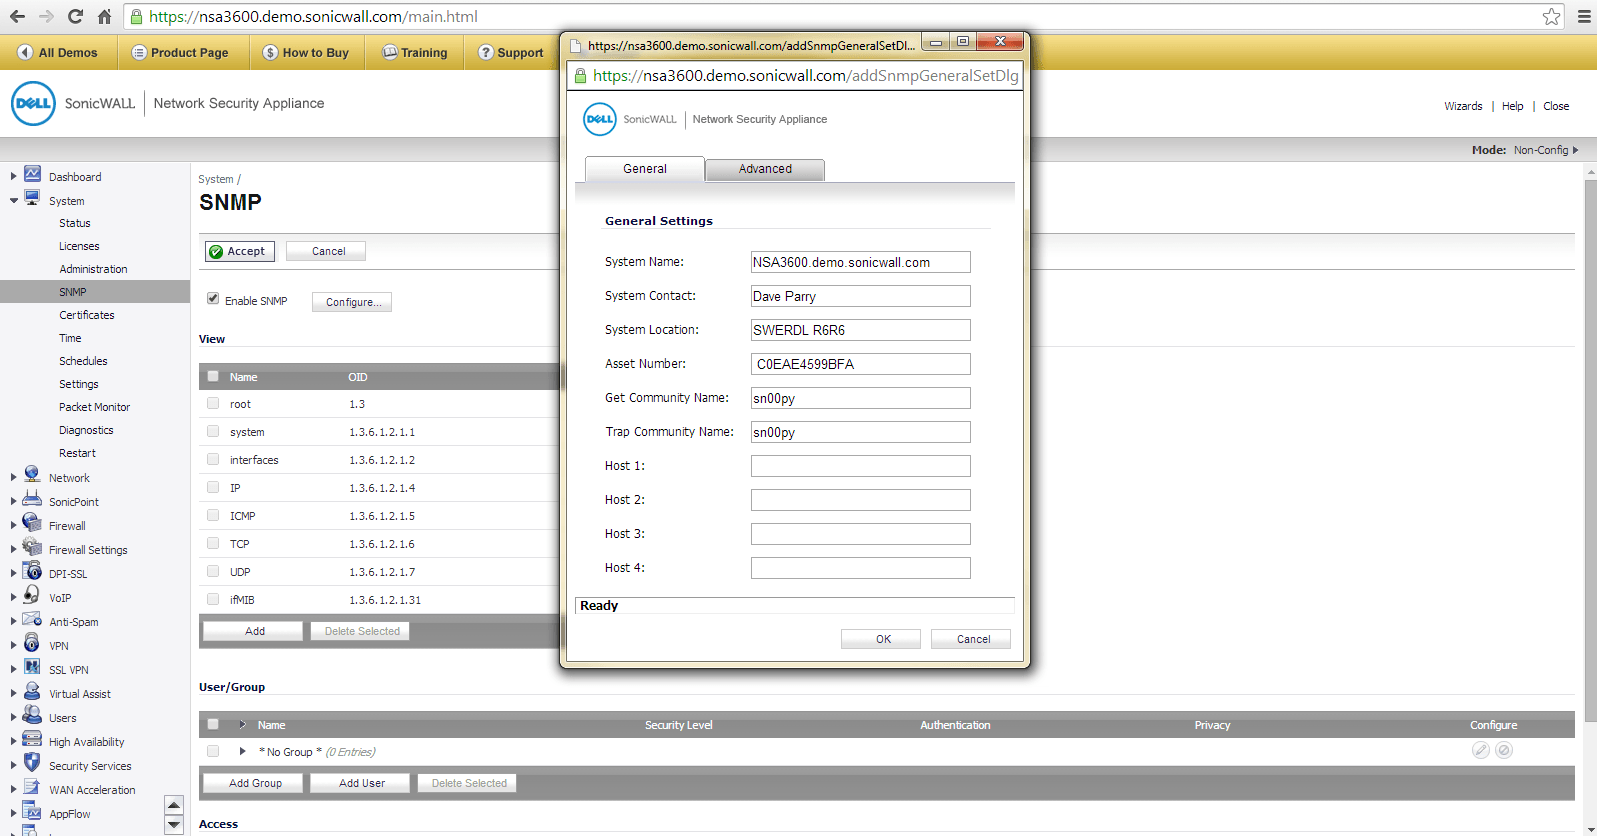
Using the image below as an example, go to System>>SNMP
1. Check the checkbox for Enable SNMP, then click Configure
2. Complete the System Name, Contact, and Location fields
3. Enter a Get Community Name
4. Enter your NetFlow collector’s IP Address in one of the Host fields.
5. Click OK
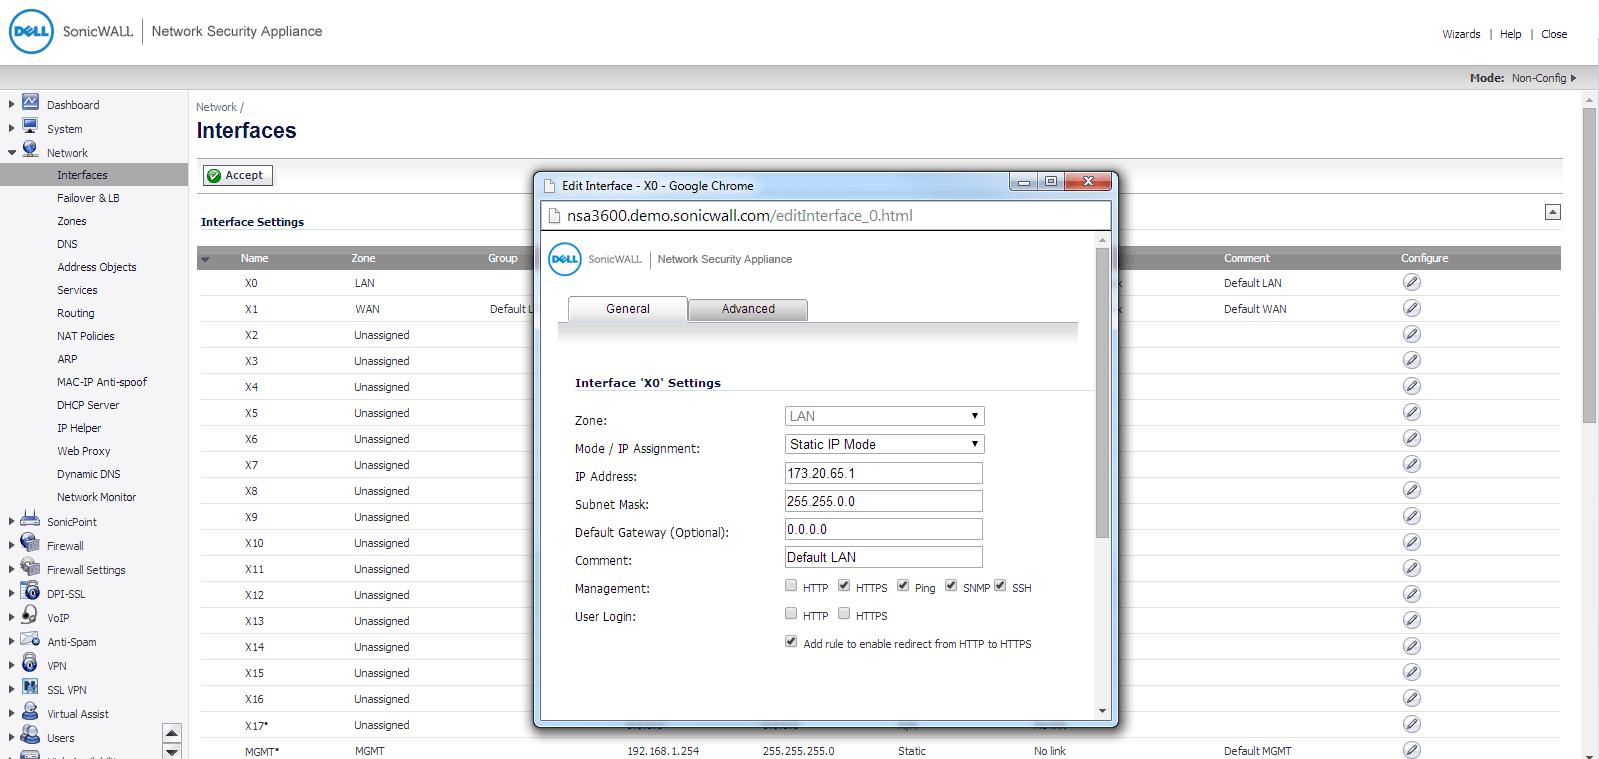
6. Next, go to Network>>Interfaces, click on the Configure icon for the interface you are exporting flows through, and make sure that in the Management section, SNMP is selected.
SNMP is now enabled and ready for your NetFlow collector to access.
Live SonicWALL Configuration Demo available
To walk through these steps before implementing in your live network, check out the Dell SonicWALL live demo site first.
SonicWALL NetFlow Reporting
We also have an evaluation of our NetFlow Analyzer available by clicking the link below, which adds value to the SonicWALL NetFlow exports by providing extended reporting on:
- HTTP URLs per connection
- User Name reporting
- Application detection
- VoIP details
- Intrusions
- Viruses
That is in addition to the standard NetFlow reporting – conversations, hosts, top protocols, and more, to simplify your network traffic monitoring and more easily provide management level reporting.
If you still have questions on configuring your Next Gen firewall to export flows, please do not hesitate to contact us directly, or for more information on what other advanced reporting is available for the Dell SonicWALL firewall, please read the SonicWALL NetFlow reporting blog. If you have any other NetFlow related questions, or would like to test our solution, please download from this page, or contact us directly at 207.324.8805 x3.


