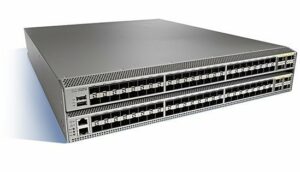
Cisco Nexus 9000 NetFlow Configuration
Recently I’ve received numerous request for a sample on the Cisco Nexus 9000 NetFlow configuration. This device has a slightly different approach to configuring NetFlow. What we’re used to seeing from Cisco is a 4-step process of defining your NetFlow record, defining your NetFlow exporter, creating your monitor and applying the monitor to an interface. Today I’d like to take a look at the founders of the NetFlow protocol, Cisco, and their Nexus 9k configuration.
Similar to blogs in the past, it’s worth mentioning the Nexus 9000 supports sFlow. SFlow has its pros and cons. Some people prefer it because it relieves some of the burden NetFlow exports can have on the device. While others prefer getting a more complete picture of their network traffic. The deciding factor generally will depend on your overall flow volume. It is important to note though, that sample NetFlow will substantially decrease the CPU utilization needed to account for NetFlow packets. That being said, let’s dig into getting your Cisco Nexus 9000 configured!
Enabling NetFlow
In order to configure sFlow on our Nexus 9000, we’ll first need to enable it:
switch# configure terminal
#Enter config mode
switch(config)#
switch(config)# feature sflow
#Enables sFlow (“no feature sflow” to disable)
switch(config)# show feature
#Displays the enabled/disabled features
switch(config)# copy running-config startup-config
#Copies the running configuration to the startup configuration
Configure our sampling rate
Now let’s configure our sampling rate:
switch# configure terminal
switch(config)#switch(config)# sflow sampling-rate 50000
#Configures the sFlow sampling rate for packets
#The sampling rate can be an integer between 4096 and 1000000000
#A sampling rate of 0 disables sampling
switch(config)# show sflow
switch(config)# copy running-config startup-config
Configure the maximum sampled size
Here we can configure the maximum number of bytes that should be copied from a sampled packet:
switch# configure terminal
switch(config)#
switch(config)# sflow max-sampled-size 200
#Configures the sFlow maximum sampling size
#The range for the sampling-size is from 64 to 256 bytes
switch(config)# show sflow
switch(config)# copy running-config startup-config
Configuring the counter poll interval
Here we’ll configure the maximum number of seconds between successive samples of the counters that are associated with the data source:
switch# configure terminal
switch(config)#
switch(config)# sflow counter-poll-interval 100
#The range for the poll-interval can be between 0 and 2147483647
#A sampling interval of 0 disables counter sampling
switch(config)# show sflow
switch(config)# copy running-config startup-config
Configure the maximum datagram size
Here we can configure the maximum number of data bytes that can be sent in a single datagram:
switch# configure terminal
switch(config)#
switch(config)# sflow max-datagram-size 2000
#The range for datagram-size is from 200 to 9000 bytes
switch(config)# show sflow
switch(config)# copy running-config startup-config
Configure sFlow collector address
Here we’ll telling the device the destination to export flows to:
switch# configure terminal
switch(config)#
switch(config)# sflow collector-ip x.x.x.x vrf management
#Configures the IPv4 address for the sFlow collector
#If the IP address is set to 0.0.0.0 all sampling is disabled
#The vrf can be:
A user-defined VRF name – You can specify a maximum of 32 alphanumeric characters.
vrf management – You must use this option if the sFlow data collector is on the network connected to the management port.
vrf default – You must use this option if the sFlow data collector is on the network connected to the front-panel ports.
switch(config)# show sflow
switch(config)# copy running-config startup-config
Configure sFlow collector port
Here we’ll define the listening port of our collector
switch# configure terminal
switch(config)#
switch(config)# sflow collector-port 2055
#The range for the collector port is from 0 to 65535
#Common ports include 2055, 2056, 9995 and 9996
switch(config)# show sflow
switch(config)# copy running-config startup-config
Configure sFlow agent address
Now we’ll configure the IPv4 address of the sFlow agent:
switch# configure terminal
switch(config)#
switch(config)# sflow agent-ip x.x.x.x
#The default IP address is 0.0.0.0 which means that all sampling is disabled on the switch.
You must specify a valid IP address to enable sFlow functionality
#This IP address is not necessarily the source IP address for sending the sFlow datagram to the collector
switch(config)# show sflow
switch(config)# copy running-config startup-config
Configure the sFlow sampling data source
Here you can configure the source of the data for the sFlow sampler as a Ethernet port, a range of Ethernet ports or a port channel:
switch# configure terminal
switch(config)#
switch(config)# sflow data-source interface ethernet 1/5-12
#sflow data-source interface [ethernet slot/port{-port}] | port-channel channel-number
#For an Ethernet daa source, slot is the slot number and port can be either a single port number or a range of ports designated as port-port
switch(config)# show sflow
switch(config)# copy running-config startup-config
Congratulations! We are now configured to export sFlow from our Nexus 9000 to our favorite traffic analyzer. Let’s go ahead and verify our configuration:
switch# show running-config sflow [all]
#Displays the current sFlow running configuration
For more information about Cisco’s Nexus 9000 you can review Cisco’s documentation here


